Mario.Game Adventure Walkthrough: All 8 Levels
A world-by-world walkthrough of Mario.Game Adventure with every power-up location, the hidden 1-Ups, tricky jumps and how to beat the Lava Castle boss.
12 min read
This walkthrough covers all eight levels of Mario.Game Adventure. Positions are described in the order you meet them while running to the right. Hidden blocks are marked so you can find every secret — or skip this page if you want to discover them yourself.
World 1-1: Green Hills
The training level. The first ? block holds a coin; the row of blocks right after it (brick, ?, brick, ?, brick) hides a Super Mushroom in the first ? block. A Walker patrols under the row — stomp it first.
Next come three pipes of growing height and a Walker pair before a pipe with a Piranha Plant. Wait until the plant sinks before you jump over. Just after that pipe, jump in the empty air above the ground: an invisible 1-Up block floats there.
After the first pit, a "brick, power-up, brick" row gives you a second chance at a mushroom, and a long brick bridge in the sky carries two Walkers and four coins. The next stretch has a multi-coin brick (hit it repeatedly — it gives up to seven coins) and a brick hiding a Starman. Use the star to plough through the Koopa and Walkers in the following section.
The level ends with a stone pyramid, a gap between two staircases and a tall staircase to the flagpole. Run up the final stairs and jump from the very top to hit the flag high for up to 5,000 points.
World 1-2: Underground
A blue cavern with a low brick ceiling. The first block of the row near the start is a power-up block. Next is a field of stone pillars with coins on top; hop from pillar to pillar to collect them.
Early on, a high brick row with coins above it contains a multi-coin brick in the middle, and in the second half the third brick of an upper brick row hides a Starman. Watch for Piranha Plants in two of the pipes. Near the end, the brick row with four normal bricks and one odd one out contains a 1-Up. Finish by climbing the staircase and jumping onto the flagpole.
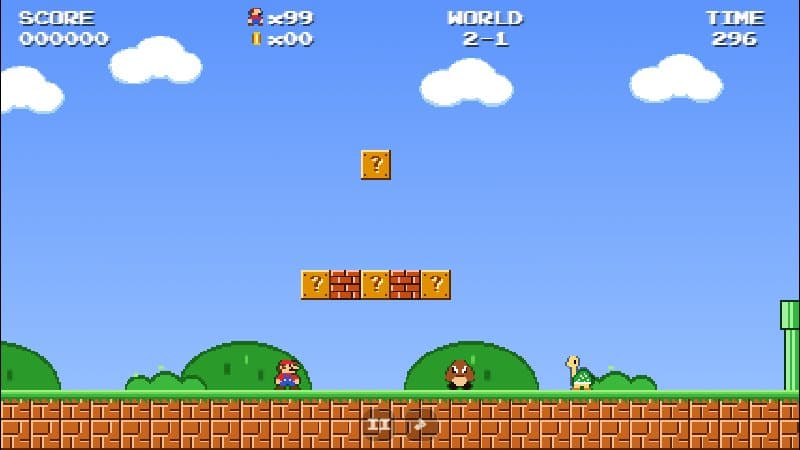
World 2-1: Mushroom Plains
A longer overworld level with more Koopas. The row at the start contains a coin block and a power-up block above it. The first Spiny appears here: you cannot stomp it, so jump over or use fireballs.
Look for an invisible 1-Up in the air just past the pipe with a Piranha Plant around the middle of the level. A brick in the high row after it holds a Starman. Later, a row of three blocks (?, power-up, ?) is followed by two Spinies — grab the flower first. The last section has a sky bridge of bricks with six coins on top and a tall staircase before the flag.
World 2-2: Cloud Kingdom
The first level with moving lifts and no ground below most platforms. Stand still on a lift and let it carry you; jump off only when the next cloud is in range. A power-up block sits above the long cloud before the first horizontal lift.
There are five lifts in total, some moving sideways and some up and down. The small three-cloud islands near the middle reward patient, short hops — do not run here. A cloud with a Koopa hides a Starman block above it. The level ends on solid ground with the flagpole.
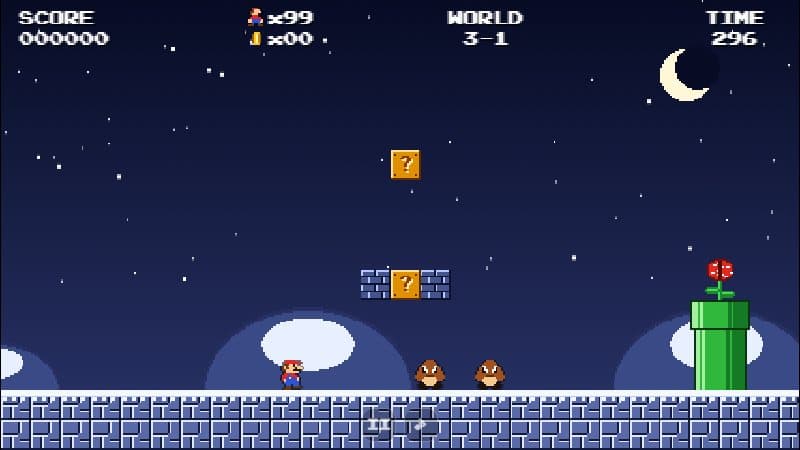
World 3-1: Frosty Night
A snowy night level that mixes everything learned so far. The power-up block is above the first brick row. Several Piranha Plant pipes come in a row around the middle — time your jumps when the plants are hidden.
Hidden items: a multi-coin brick in the middle of the "?, brick, ?" row, a Starman in a brick between two Spinies, and an invisible 1-Up above the "B?B?B" row near the end. After the stone staircase, two Koopas walk toward you — kick a shell into them for chain points.
World 3-2: Sunset Treetops
You jump between mushroom-shaped treetops at different heights over a bottomless drop. The row "?, power-up, ?" above the third tree gives a mushroom or flower. The trees get narrower as you go, and three lifts link the gaps. A brick in the middle of the trio above the wide tree around the halfway point hides a Starman.
Use short hops between narrow treetops; a full running jump can carry you past a three-tile platform.
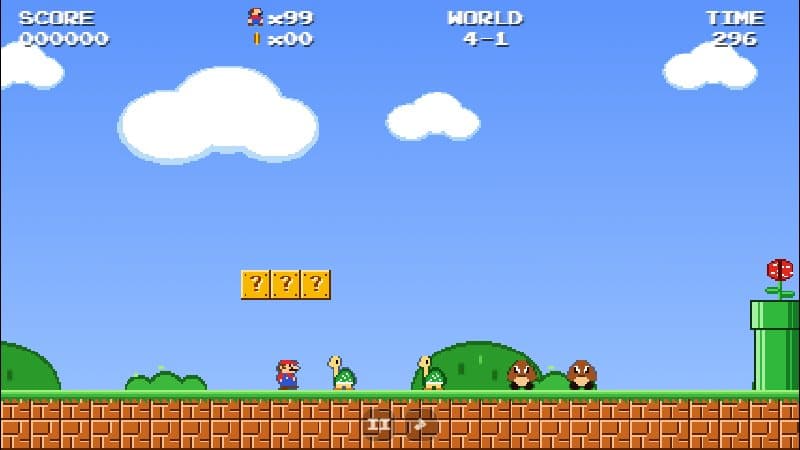
World 4-1: Fortress Road
The last overworld level is crowded. Two Koopas and two Walkers greet you at the start; the power-up block is in the very first row. Above the six-brick row there is a Starman — perfect for the two Spinies right below.
Many pipes here hold Piranha Plants. There are stone pillars and a raised wall to vault, a multi-coin brick in the "?, brick, ?" row under the long sky bridge, and a group of three Spinies guarded by a power-up block in front of them. Finish with the tall staircase and flagpole.
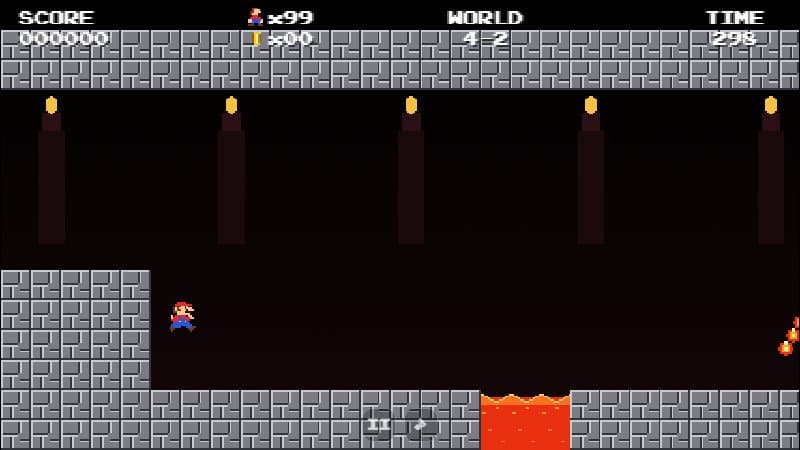
World 4-2: Lava Castle
The finale. The castle has lava pits, rotating fire bars, a moving lift over lava and the boss.
- Jump the first lava pit, then pass the fire bar after it — wait until the bar swings upward, then walk under it.
- A raised stone row with another fire bar follows; above-right is a "?, power-up, ?" row. Get the power-up — you will want to be big for the boss.
- Cross the long lava pit using the small stone island in the middle.
- The hall with a low ceiling has two fire bars, one at ceiling height and one at floor level. Move between their rotations.
- Ride the horizontal lift over the next lava lake.
- Two more fire bars guard the last room; a final power-up block sits between them.
- On the bridge over the lava lake waits the boss. It jumps and breathes fire. Five fireballs defeat it, a Starman hurts it too — or simply get past it and touch the axe at the end of the bridge to collapse the bridge and win.
After the credits
Finishing 4-2 completes the game. Every level stays unlocked on the title screen, so you can replay any world to beat your best score. Check the high score guide for ways to squeeze out more points.